Custom Slider Widget for Elementor vs WPBakery
The author shares his experience and opinion about Elementor and WPBakery, highlighting the strengths and weaknesses of each plugin. While Elementor offers great flexibility for custom widgets, it has limitations such as no nested repeaters, while WPBakery provides an easy entry point for designs but does not have a free version, and both plugins suffer from excessive HTML DOM.
In this article, we’ll create custom widgets for the two most popular page builders: Elementor VS WPBakery.
The code will be executed in a Docker environment with the following parameters:
- PHP 8.3
- MariaDB 10.5
- WordPress 6.6.2
- Child Theme Twenty Twenty-Two
- Composer + Autoload class
- WPBakery 7.7.1 (the latest available version)
- Elementor 3.24.7 (the latest free version at the time of writing)
- Query Monitor 3.16.4
- Browser: Chrome on macOS (latest version at the time of writing)
- Lighthouse (mobile and desktop, performance only)
All plugins used in testing are from official repositories.
Comparison Criteria
- Number of scripts loaded
- Number of stylesheets loaded
- Page render time
- Memory usage
- Number of database queries
- Database response time
- Number of slow queries
- Lighthouse mobile score
- Lighthouse desktop score
Creating a Custom Widget for Elementor:
Let’s start creating a custom widget for Elementor
The first step is to initialize the project by running composer init and you are setting up the standard project configurations. If you’re not yet familiar with using Composer in your projects, check out this article.
Here’s what I ended up with:
{
  "name": "iwpdev/test-theme",
  "homepage": "https://i-wp-dev.com/",
  "autoload": {
    "psr-4": {
      "TestTheme\\": "src/php"
    }
  },
  "autoload-dev": {
    "psr-4": {
      "TestTheme\\": "src/php"
    }
  },
  "prefer-stable": true,
  "authors": [
    {
      "name": "alexl",
      "email": "ad***@******ev.com"
    }
  ],
  "config": {
    "platform": {
      "php": "7.4"
    }
  },
  "minimum-stability": "dev",
  "require-dev": {
    "roave/security-advisories": "dev-latest",
    "squizlabs/php_codesniffer": "^3.5",
    "phpcompatibility/php-compatibility": "^9.3",
    "phpcompatibility/phpcompatibility-wp": "^2.1",
    "wp-coding-standards/wpcs": "^2.3",
    "php-coveralls/php-coveralls": "^2.4"
  },
  "require": {
  },
  "scripts": {
    "phpcs": "vendor/bin/phpcs --colors --standard=phpcs.xml"
  }
}
The second step is to go to functions.php and add the following code. In it, we load the parent theme’s styles, then include Composer for class autoloading and initialize our main class.
<?php
/**
 * Functions theme file.
 *
 * @package iwpdev/test-theme
 */

use TestTheme\Main;

/**
 * Add parent style.
 *
 * @return void
 */
function enqueue_parent_styles(): void {
	wp_enqueue_style( 'parent-style', get_template_directory_uri() . '/style.css', '', '1.0', 'all' );
}

add_action( 'wp_enqueue_scripts', 'enqueue_parent_styles' );


require_once __DIR__ . '/vendor/autoload.php';

new Main();
I prefer keeping the code in functions.php minimal, with all the magic happening in separate classes that are properly named, where each file is responsible for its own functionality.
Now it’s time to create the main theme class, which will be responsible for connecting all the classes and the main functions of our theme.
<?php
/**
 * Main theme class.
 *
 * @package iwpdev/test-theme
 */

namespace TestTheme;

use Elementor\Plugin;

/**
 * Main class file.
 */
class Main {
	/**
	 * Main construct.
	 */
	public function __construct() {
		$this->init();
	}

	/**
	 * Init actions and filter.
	 *
	 * @return void
	 */
	public function init(): void {
		new WPBakerySwiperJsSlider();

		add_action( 'wp_enqueue_scripts', [ $this, 'add_style_and_scripts' ] );

		add_action( 'elementor/widgets/widgets_registered', [ $this, 'register_elementor_widgets' ] );
	}

	/**
	 * Add style and script.
	 *
	 * @return void
	 */
	public function add_style_and_scripts(): void {
		wp_enqueue_style( 'test-theme-swiper', '//cdn.jsdelivr.net/npm/swiper@11/swiper-bundle.min.css', '', '11.0.0' );
		wp_enqueue_style( 'test-theme-main', get_stylesheet_directory_uri() . '/assets/css/main.css', [], '1.0.0' );

		wp_enqueue_script( 'test-theme-swiper', '//cdn.jsdelivr.net/npm/swiper@11/swiper-bundle.min.js', [ 'jquery' ], '11.0.0', true );
		wp_enqueue_script( 'test-theme-main', get_stylesheet_directory_uri() . '/assets/js/main.js', [ 'jquery' ], '1.0.0', true );

	}

	/**
	 * Register elementor widgets.
	 *
	 * @return void
	 */
	public function register_elementor_widgets(): void {
		Plugin::instance()->widgets_manager->register_widget_type( new ElementorSwiperJsSlider() );
	}
}
In this class, we initialize all actions, filters, and classes in the init() function. I don’t think there’s a need to explain this code to you.
We use the elementor/widgets/widgets_registered hook to add our custom widget to the Elementor widgets list. The register_elementor_widgets function (see the code above in Main.php) will handle this.
We create a class that will be responsible for our widget, named ElementorSwiperJsSlider. It should extend the standard Elementor\Widget_Base class, allowing us to create our own widget for Elementor.
<?php
/**
 * Elementor swiper class.
 *
 * @package iwpdev/test-theme
 */

namespace TestTheme;

use Elementor\Controls_Manager;
use Elementor\Repeater;
use Elementor\Widget_Base;

/**
 * ElementorSwiperJsSlider class file.
 */
class ElementorSwiperJsSlider extends Widget_Base {
	/**
	 * Get Name Widget.
	 *
	 * @inheritDoc
	 */
	public function get_name() {
		return __( 'Swiper slider', 'twentytwentytwo' );
	}

	/**
	 * Get Title.
	 *
	 * @return string|void
	 */
	public function get_title() {
		return __( 'Swiper slider', 'twentytwentytwo' );
	}

	/**
	 * Get Icon Widget.
	 *
	 * @return string
	 */
	public function get_icon(): string {
		return 'eicon-hotspot';
	}

	/**
	 * Category Widget.
	 *
	 * @return string[]
	 */
	public function get_categories(): array {
		return [ 'basic' ];
	}

	/**
	 * Register controls.
	 */
	protected function register_controls(): void {
		$repeater = new Repeater();

		$this->start_controls_section(
			'content_app_slider',
			[
				'label' => __( 'Slider', 'twentytwentytwo' ),
				'tab'   => Controls_Manager::TAB_CONTENT,
			]
		);


		$repeater->add_control(
			'image',
			[
				'label'   => esc_html__( 'Add Images', 'twentytwentytwo' ),
				'type'    => Controls_Manager::GALLERY,
				'default' => [],
			]
		);

		$repeater->add_control(
			'title',
			[
				'label'       => __( 'Title', 'twentytwentytwo' ),
				'type'        => Controls_Manager::TEXT,
				'default'     => '',
				'placeholder' => __( 'Set a title', 'twentytwentytwo' ),
			]
		);

		$repeater->add_control(
			'sub_title',
			[
				'label'       => __( 'Sub Title', 'twentytwentytwo' ),
				'type'        => Controls_Manager::TEXT,
				'default'     => '',
				'placeholder' => __( 'Set a sub title', 'twentytwentytwo' ),
			]
		);

		$this->add_control(
			'app_slider',
			[
				'label'   => __( 'Navigation element', 'twentytwentytwo' ),
				'type'    => Controls_Manager::REPEATER,
				'fields'  => $repeater->get_controls(),
				'default' => [],
			]
		);

		$this->end_controls_section();
	}

	/**
	 * Output html render.
	 */
	protected function render(): void {

		$sliders = (object) $this->get_settings_for_display();
		?>
		<!-- Slider main container -->
		<div class="swiper <?php echo esc_attr( $css_class ?? '' ); ?>">
			<!-- Additional required wrapper -->
			<div class="swiper-wrapper">
				<!-- Slides -->
				<?php
				foreach ( $sliders->app_slider as $slide ) {
					$image = wp_get_attachment_image_url( $slide['image'][0]['id'], 'full' );
					?>
					<div class="swiper-slide" >
						<img
								src="<?php echo esc_url( $image ?? '' ); ?>"
								alt="<?php echo esc_attr( $slide['image'][0]['id'] ?? '' ); ?>">
                        <div class="swiper-text">
                            <h2><?php echo wp_kses_post( $slide['title'] ); ?></h2>
                            <h3>
                                <?php echo wp_kses_post( $slide['sub_title'] ); ?></h3>
                        </div>
					</div>
				<?php } ?>
			</div>
			<div class="swiper-button-next"></div>
			<div class="swiper-button-prev"></div>
			<div class="swiper-pagination"></div>
		</div>
		<?php
	}

}
The register_controls function is responsible for registering our fields for the widgets. You can find the types and code examples in the documentation at this link: https://developers.elementor.com/docs/editor-controls/control-types/
The render function is responsible for outputting our Elementor widget. It outputs both on the front-end and the back-end. To retrieve data from the fields, you should use $this->get_settings_for_display().
Next, we need to create and add the initialization for the slider and some styles to make it look more appealing.
In the assets/js folder, create a main.js file. It will be responsible for initializing the slider.
/* global jQuery, Swiper */
jQuery( document ).ready( function( $ ) {
	const swiper = new Swiper( '.swiper', {
		pagination: {
			el: '.swiper-pagination',
			type: 'fraction',
		},
		navigation: {
			nextEl: '.swiper-button-next',
			prevEl: '.swiper-button-prev',
		},
	} );
} );
In the assets/css folder, create a main.css file. It will be responsible for the appearance of our slider.
.is-layout-constrained > :where(:not(.alignleft):not(.alignright):not(.alignfull)) {
	max-width: 1140px !important;
}

.swiper {
	width: 100%;
	container-type: inline-size;
}

.swiper-slide {
	text-align: center;
	font-size: 18px;
	background: #fff;
	display: flex;
	justify-content: center;
	align-items: center;
	position: relative;
	container-type: size;
}

.swiper-slide img {
	display: block;
	width: 100%;
	height: 100%;
	object-fit: cover;
}

.swiper-wrapper {
	height: calc(100cqw / 1.77) !important;
}

.swiper-slide .swiper-text {
	position: absolute;
	display: flex;
	flex-direction: column;
	justify-content: center;
	gap: 20px;
	left: 0;
	right: 0;
	bottom: 0;
	top: 0;
	background: rgba(0, 0, 0, .5);
	padding: 10cqh 10cqw;
}

.swiper-pagination,
.swiper-button-next::after,
.swiper-button-prev::after {
	color: #fff !important;
}

.swiper-slide .swiper-text h1,
.swiper-slide .swiper-text h2,
.swiper-slide .swiper-text h3,
.swiper-slide .swiper-text h4,
.swiper-slide .swiper-text h5
.swiper-slide .swiper-text p {
	text-align: left;
	color: #fff;
	margin: 0;
	line-height: 1.1;
}
If you follow along and do everything correctly, you should achieve a result as shown in the screenshots below.
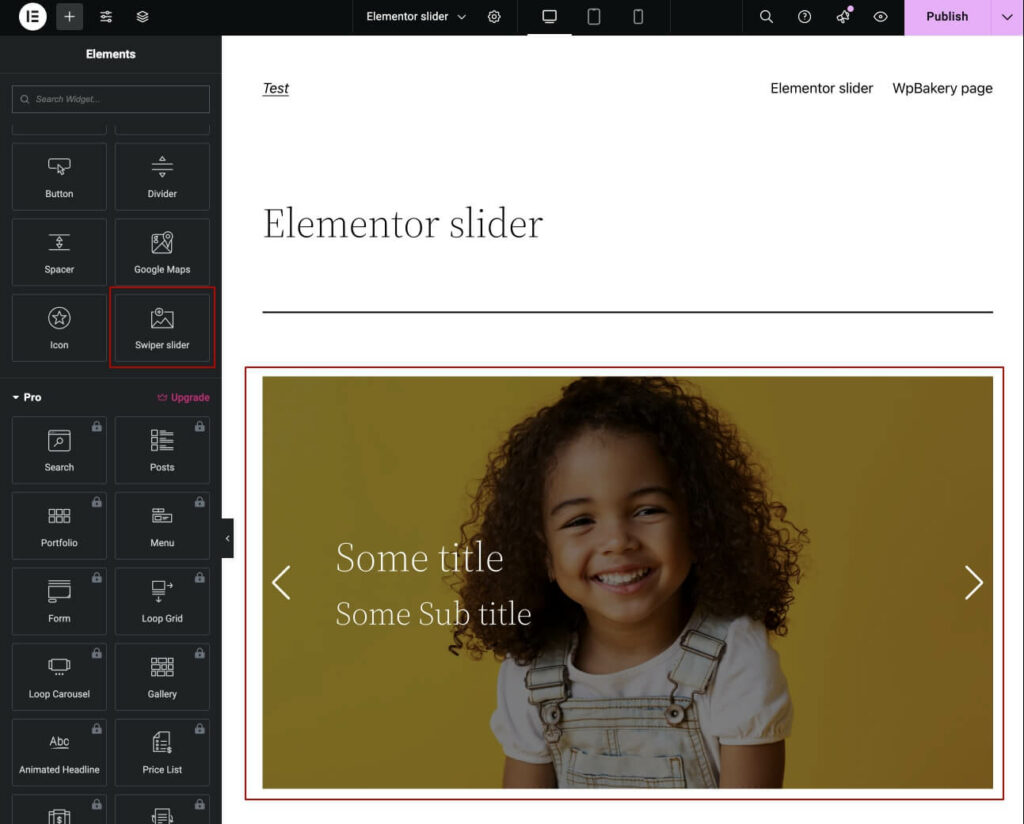
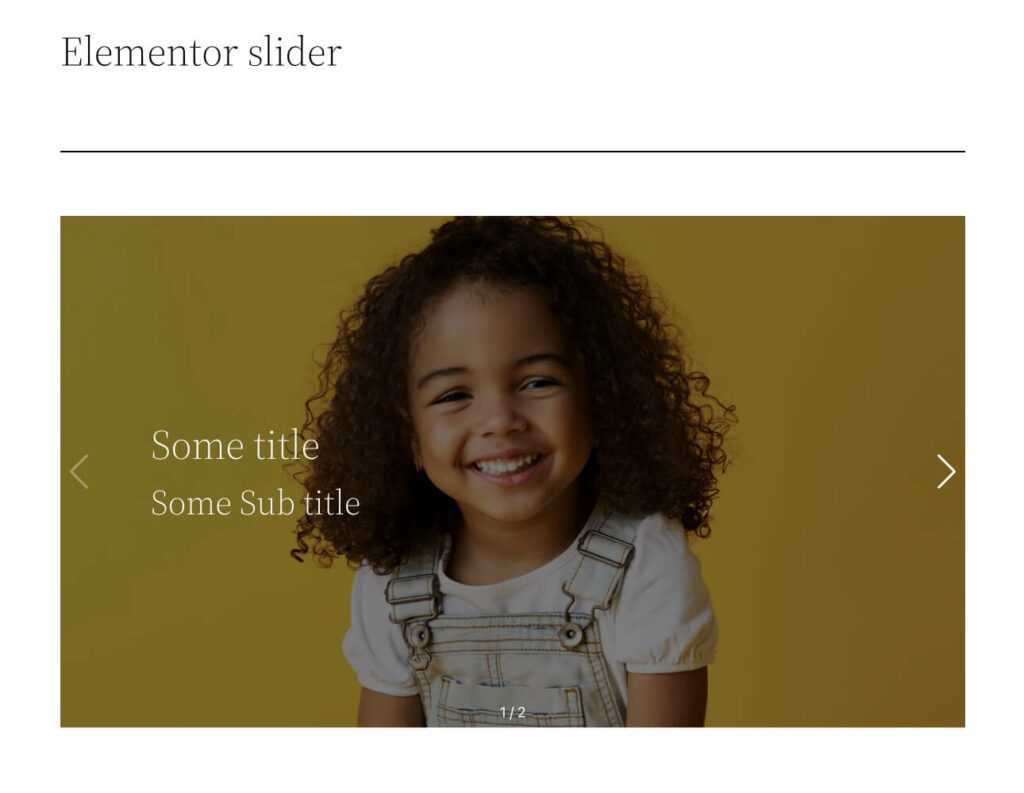
Now it’s time for the first test. For a clean experiment, the widget initialization class for WPBakery and the plugin itself were disabled.
Here are the results I obtained:
- Page Generation Time: 0.3099s
- Memory Usage: 7.6 MB
- Database Queries Time: 0.0247s
- Database Queries Total: 75
- Database Queries Slow: 2
- Scripts: 30
- Style: 23
- Lighthouse mobile: 61
- Lighthouse desktop: 93
Here are the results we obtained. Please note that there is only one slider on the page, and there are no additional blocks. The plugins are kept to a minimum, with only those mentioned above enabled, so your results may vary slightly.
Let’s move on to creating the slider for WPBakery.
To do this, simply uncomment the instance of the WPBakerySwiperJsSlider() class in the init function in main.php. Here is the code for that class:
<?php
/**
 * Wp Bakery Swiper slider.
 *
 * @package iwpdev/test-theme
 */

namespace TestTheme;

/**
 * WPBakerySwiperJsSlider class file.
 */
class WPBakerySwiperJsSlider {

	/**
	 * Icon folder url.
	 *
	 * @var string
	 */
	private string $icon_url = '';

	/**
	 * Swiper slider construct.
	 */
	public function __construct() {
		add_shortcode( 'wpb_swiper_slider', [ $this, 'output' ] );

		// Map shortcode to Visual Composer.
		if ( function_exists( 'vc_lean_map' ) ) {
			vc_lean_map( 'wpb_swiper_slider', [ $this, 'map' ] );
		}

		$this->icon_url = get_stylesheet_directory_uri() . '/assets/img/icons/';
	}

	/**
	 * Map field.
	 *
	 * @return array
	 */
	public function map(): array {
		return [
			'name'                    => esc_html__( 'WPBakery Swiper Slider', 'twentytwentytwo' ),
			'description'             => esc_html__( 'WPBakery Swiper Slider', 'twentytwentytwo' ),
			'base'                    => 'wpb_swiper_slider',
			'category'                => __( 'IWPDEV', 'twentytwentytwo' ),
			'show_settings_on_create' => false,
			'icon'                    => $this->icon_url . 'images-regular.svg',
			'params'                  => [
				[
					'type'       => 'param_group',
					'value'      => '',
					'heading'    => __( 'Slides', 'twentytwentytwo' ),
					'param_name' => 'slides',
					'params'     => [
						[
							'type'       => 'attach_image',
							'value'      => '',
							'heading'    => __( 'Slide', 'twentytwentytwo' ),
							'param_name' => 'slide_image',
						],
						[
							'type'       => 'textarea',
							'value'      => '',
							'heading'    => __( 'Title', 'twentytwentytwo' ),
							'param_name' => 'content_text_title',
						],
						[
							'type'       => 'textarea',
							'value'      => '',
							'heading'    => __( 'Sub Title', 'twentytwentytwo' ),
							'param_name' => 'content_text_sub_title',
						],
					],
				],
				[
					'type'       => 'css_editor',
					'heading'    => esc_html__( 'Custom css', 'twentytwentytwo' ),
					'param_name' => 'css',
					'group'      => esc_html__( 'Design options', 'twentytwentytwo' ),
				],
			],
		];
	}

	/**
	 * Output Short Code template
	 *
	 * @param mixed       $atts    Attributes.
	 * @param string|null $content Content.
	 *
	 * @return string
	 */
	public function output( $atts, string $content = null ): string {
		ob_start();
		$css_class = vc_shortcode_custom_css_class( $atts['css'] ?? '', ' ' );
		$slides    = vc_param_group_parse_atts( $atts['slides'] );

		if ( ! empty( $slides ) ) {
			?>
			<!-- Slider main container -->
			<div class="swiper <?php echo esc_attr( $css_class ?? '' ); ?>">
				<!-- Additional required wrapper -->
				<div class="swiper-wrapper">
					<!-- Slides -->
					<?php
					foreach ( $slides as $slide ) {
						$image = wp_get_attachment_image_url( $slide['slide_image'], 'full' );
						?>
						<div class="swiper-slide">
							<img
									src="<?php echo esc_url( $image ?? '' ); ?>"
									alt="<?php echo esc_attr( $slide['slide_image'] ?? '' ); ?>">
				            <div class="swiper-text">
                                <h2><?php echo wp_kses_post( $slide['content_text_title'] ); ?></h2>
                                <h3><?php echo wp_kses_post( $slide['content_text_sub_title'] ); ?></h3>
				            </div>
						</div>
					<?php } ?>
				</div>
				<div class="swiper-button-next"></div>
				<div class="swiper-button-prev"></div>
				<div class="swiper-pagination"></div>
			</div>
			<?php
		}

		return ob_get_clean();
	}
}
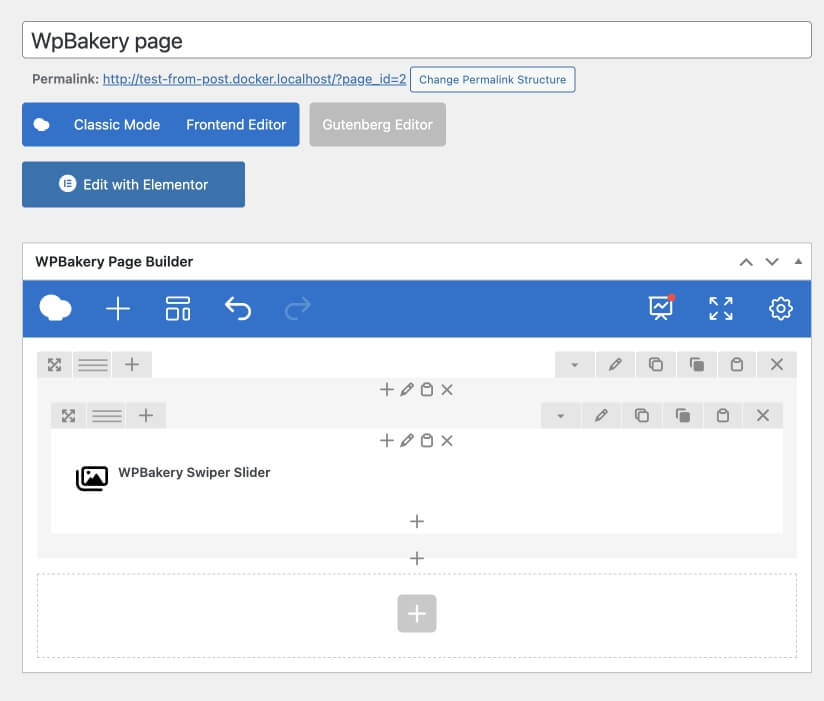
In this class, the output function is responsible for rendering our HTML on the front-end. It also registers a new shortcode in WordPress because WPBakery is based on a shortcode architecture.
The map function, which is passed to the WPBakery vc_lean_map function (responsible for adding our widget in the WPBakery back-end), is responsible for adding fields for the widget in the admin panel. You can find the documentation on field types and their configuration here: https://kb.wpbakery.com/docs/inner-api/vc_map/
If you are following along and doing everything correctly, you should achieve a result as shown in the screenshots below.
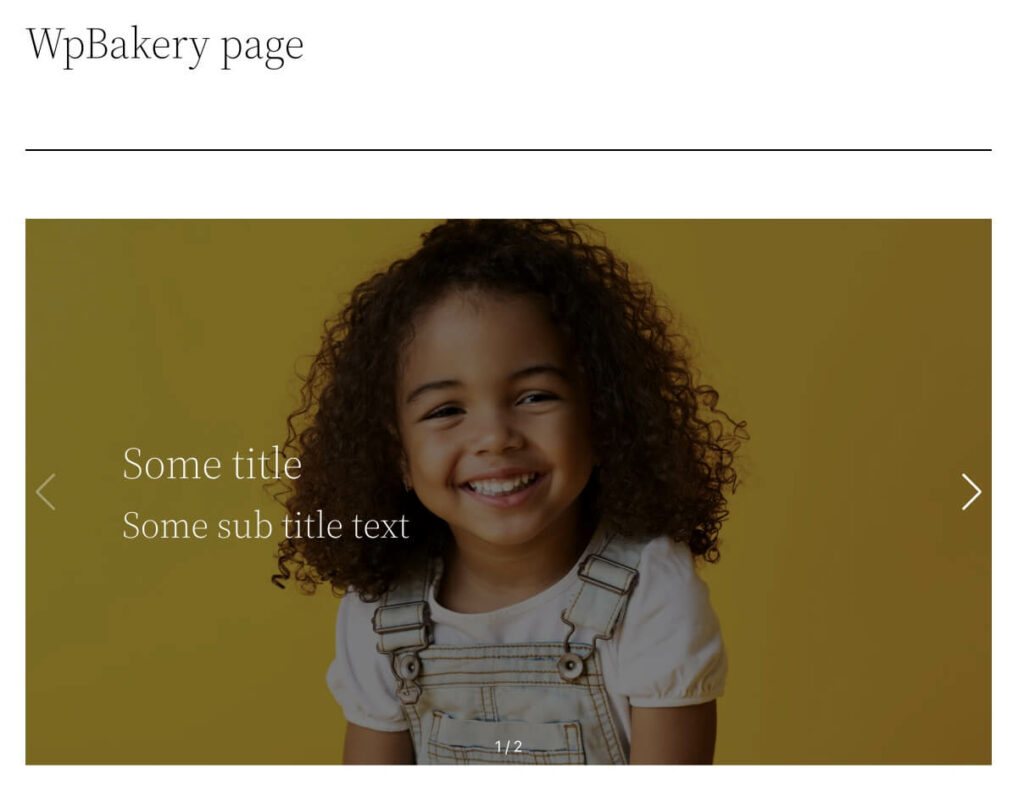
Here are the results I obtained:
- Page Generation Time: 0.2421s
- Memory Usage: 5.4 MB
- Database Queries Time: 0.0207s
- Total Database Queries: 33
- Slow Database Queries: 0
- Scripts: 10
- Styles: 41 (This result is unclear because it started loading wp-block scripts from the parent theme)
- Lighthouse Mobile: 62
- Lighthouse Desktop: 90
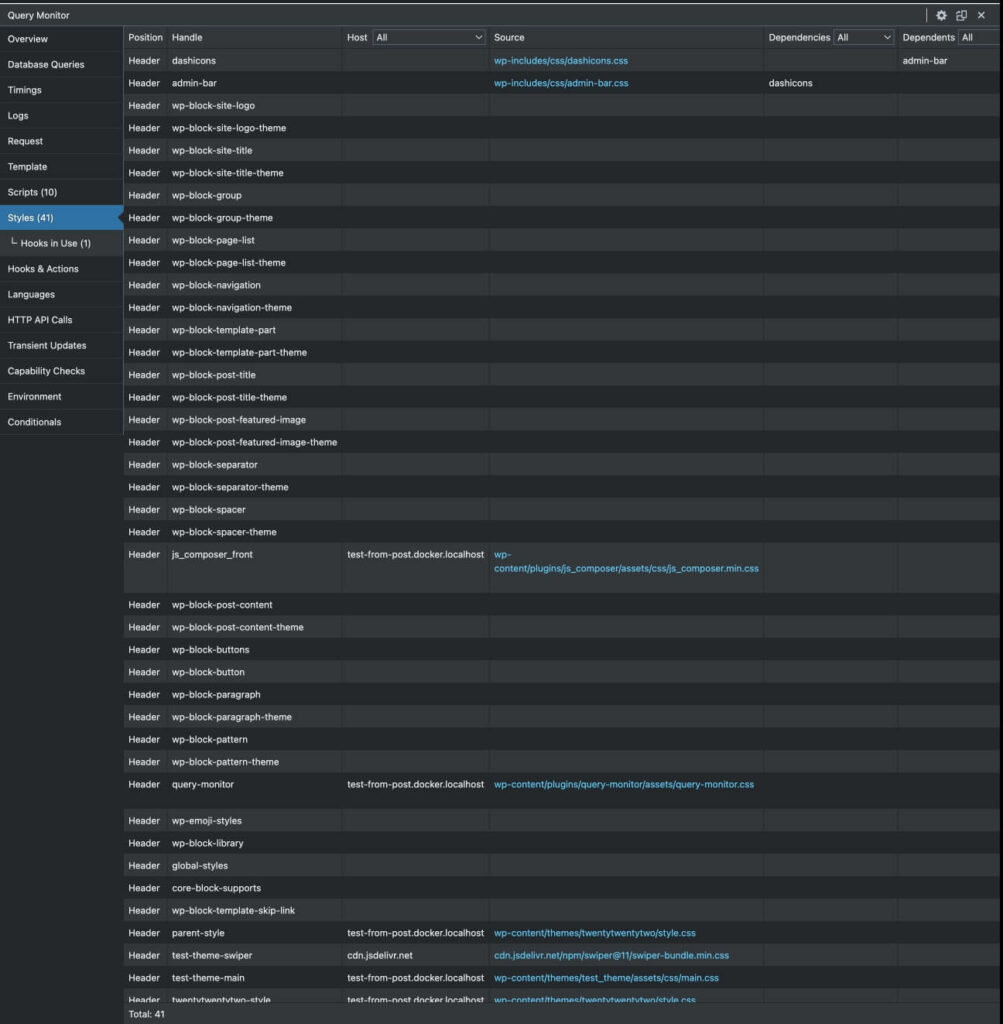
Let’s compare the result we got:
| Comparison parameter | Elementor | WPBakery |
| Page Generation Time | – | + |
| Memory Usage | – | + |
| Database Queries time | – | + |
| Database Queries total | – | + |
| Database Queries slow | – | + |
| Scripts | – | + |
| Style | + | – |
| Lighthouse mobile | – | + |
| Lighthouse desktop | + | – |
The author’s thoughts on each of the plugins:
Elementor – I really enjoy creating custom widgets for this plugin. The good documentation and OOP approach allow for flexible solutions and complex widgets. It’s suitable for clients who are not very demanding regarding database query optimization and the number of scripts but appreciate seeing what they are creating directly in the editor.
The downsides of this plugin that I have encountered in my work:
(This is my personal experience, and others may have different experiences with this plugin. The author is not the final authority, and you may disagree with this conclusion.)
- There is no way to add a repeater field within a repeater (yes, someone might say to create a wrapper element and use it, but it’s not as convenient as in competitors).
- Persistent front-end issues with the mobile version because I have to override many classes to achieve the desired result.
- In my opinion, excessive HTML DOM nesting for building the page.
WPBakery – I have used this plugin for a long time to create custom themes based on it. It has a very low entry threshold for implementing various designs and custom widgets, excellent documentation, a great community, and is easy to use.
Now for the downsides of this plugin:
- Only a paid version is available.
- The ability to use WYSIWYG only once in an element, and there is no option to add it in a repeater.
- Excessive HTML DOM, similar to Elementor.
- The visual editor in the admin panel is inconvenient (sometimes it glitches and conflicts with other plugins; it may have been fixed, but I have never used it). I only use the back-end editor.
You can find the complete theme code on my GitHub here.
Related posts
Insights and Tips from My Journey

- Category:
- Maintenance
Setting Up GitHub Actions for Automatic WPCS Verification: A Guide for PHP and WordPress
Ready to Take Your Project
to the Next Level?
Let’s bring your vision to life with expert development and custom solutions.
Contact us now and get started on transforming your ideas into reality!

